By far the most common question we get is (unsurprisingly): “How do I get a good scan every time?”
We originally thought this would be a simple question to answer—discuss some settings, talk about lighting and post-processing features, and call it a day. But then we realized there was a more important question at the heart of it: How does scanning even work?
Today, we’re going to pull back the curtain. Once you grasp the "secret" of how scanning works, getting a great scan every time becomes second nature.
The Big Secret: Scanners are Just Video Cameras
No matter what scanner you use, if it’s not bolted to a table, it’s a video camera (and to be honest, most of the ones bolted to tables are video cameras too).
To be precise, a modern scanner is two or more cameras connected to a projector. * The Process: The projector casts a pattern on a surface.
-
The Capture: The cameras take two different pictures of that projection.
-
The Result: When those pictures are "smooshed" together, they create a 3D image from a single perspective called a depth frame.
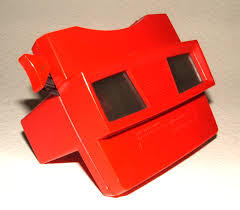
If you ever used a View-Master as a kid, it's the exact same principle!
Time vs. Space
Normally, when you use a video recorder, each shot represents a moment of captured time. A video of a child smiling is just hundreds of images taken at different times that look like movement when played in order.
With 3D cameras, you’re capturing space. Each second the camera moves around the object, dozens of new perspectives are being captured. At the end of the process, all those perspectives are smashed together according to where and when they were taken. Voila—a 3D model is born.
The Critical Difference: Tracking
You might see the analogies: Regular cameras use crosshairs; 3D cameras use a bounding box. Regular cameras use flashbulbs; 3D cameras use projectors. Moving too fast makes both images blurry.
The real difference is tracking. A normal video camera doesn't really care where it is in relationship to its subject. But a 3D camera must always know where it is in real-time. It gets this data from the iPad it's mounted on, as well as tracking pixels embedded in each depth frame. If tracking is lost, the camera can’t tell where the new depth frame should go, and the scan fails.
How to Get a Great Scan Every Time
Now that you know how the "brain" of the scanner works, here is how you set it up for success.
1. Setting the Scene
-
Clear the Path: Make sure you can move easily around the object. Remove chairs, shelving, or trip-hazards before you hit start.
-
Maintain Distance: Ideally, keep an equal distance from the camera for every section of the scene.
-
Control the Light: Scan indoors and away from natural light. The sensor’s projector uses IR light, which can be washed out by the sun or reflected weirdly by mirrors.
-
Handle Dark Surfaces: IR light is absorbed by deep black surfaces. If you're scanning a black backpack or chair, use the "Dark Object" setting to add extra power to the projection.
2. Camera Prep
-
Cleanliness: Wipe down the lens plate.
-
Software: Ensure you are on the latest firmware.
-
Calibration: Ensure the sensor is calibrated (check our specific guide for this).
3. Software Settings & Bounding Box
Select the scanning mode that best describes your object. On the next screen, pick your specific scanner type to ensure the highest quality.
-
Positioning: The object must fit inside the bounding box.
-
One Finger: Push or pull the box closer or further away.
-
Two Fingers: Make the box larger or smaller.
-
Auto (Table Top): Use this for objects on the ground or large tables.
-
Caution: Do not use this for objects hanging in the air or on the edge of a shelf; the tracker will get confused!
-
The "Spray Can" Technique
When you are ready to begin, use this method to ensure great coverage and plenty of tracking data:
-
Start at center.
-
Move Up: Go as high as you need to go.
-
Return to center.
-
Move Down: Go as low as you need to go.
-
Return to center.
-
Move Left or Right.
-
Repeat until the target is completely covered.
Cheat Sheet: Presets
Presets handle the technical details like resolution, camera speed, and gain. Choose the one that fits your goal:
| Preset | Best For... | Notes |
| Simplified | Speed & Tracking | Exclusive to Sensor 3. Fast, but lower detail. |
| Body | General Scanning | The best balance of speed and detail. |
| Body (Detailed) | High-Res Meshes | Very low frame rate; move the sensor very gently. |
| Close | Near Objects | Use for objects 35 cm from the camera. |
| Ultra Close | Very Near Objects | Use for objects 30 cm from the camera. |